Sunday 7 April 2013

This article tries to minimize hard-coding in ETL, thereby increasing flexibility, reusability, readabilty and avoides rework through the judicious use of Informatica Parameters and Variables.
Step by step we will see what all attributes can be parameterized in Informatica from Mapping level to the Session, Worklet, Workflow, Folder and Integration Service level.
Parameter files provide us with the flexibility to change parameter and variable values every time we run a session or workflow.
So, let us begin the journey!

Parameter File in Informatica

  1. A parameter file contains a list of parameters and variables with their assigned values.
    • $$LOAD_SRC=SAP
    • $$DOJ=01/01/2011 00:00:01
    • $PMSuccessEmailUser=admin@mycompany.com
  2. Each heading section identifies the Integration Service, Folder, Workflow, Worklet, or Session to which the parameters or variables apply.
    • [Global]
    • [Folder_Name.WF:Workflow_Name.WT:Worklet_Name.ST:Session_Name]
    • [Session_Name]
  3. Define each parameters and variables definition in the form name=value pair on a new line directly below the heading section. The order of the parameters and variables is not important within the section.
    [Folder_Name.WF:Workflow_Name.ST:Session_Name]
    $DBConnection_SRC=Info_Src_Conn
    $DBConnection_TGT=Info_Tgt_Conn
    $$LOAD_CTRY=IND
    $Param_Src_Ownername=ODS
    $Param_Src_Tablename=EMPLOYEE_IND
    
  4. The Integration Service interprets all characters between the beginning of the line and the first equal signs as the parameter name and all characters between the first equals sign and the end of the line as the parameter value. If we leave a space between the parameter name and the equals sign, Integration Service interprets the space as a part of the parameter name.
  5. If a line contains multiple equal signs, Integration Service interprets all equals signs after the first one as part of the parameter value.
  6. Do not enclose parameter or variable values in quotes as Integration Service interprets everything after the first equals sign as part of the value.
  7. Do not leave unnecessary line breaks or spaces as Integration Service interprets additional spaces as part of a parameter name or value.
  8. Mapping parameter and variable names are not case sensitive.
  9. To assign a null value, set the parameter or variable value to <null> or simply leave the value blank.
    • $PMBadFileDir=<null>
    • $PMCacheDir=
  10. The Integration Service ignores lines that are not valid headings,or do not contain an equals sign character (=) as Comments.
    ---------------------------------------
    Created on 01/01/2011 by Admin.
    Folder: Work_Folder 
    CTRY:SG
    ; Above are all valid comments 
    ; because this line contains no equals sign.
    
  11. Precede parameters and variables used within mapplets with their corresponding mapplet name.
    [Session_Name]
    mapplet_name.LOAD_CTRY=SG
    mapplet_name.REC_TYPE=D
    
  12. If a parameter or variable is defined in multiple sections in the parameter file, the parameter or variable with the smallest scope takes precedence over parameters or variables with larger scope.
    [Folder_Name.WF:Workflow_Name]
    $DBConnection_TGT=Orcl_Global
    [Folder_Name.WF:Workflow_Name.ST:Session_Name]
    $DBConnection_TGT=Orcl_SG
    
    In the specified session name, the value for session parameter $DBConnection_TGT is Orcl_SG and for rest all other sessions in the workflow, the connection object used will be Orcl_Global.

Scope of Informatica Parameter File

Next we take a quick look on how we can restrict the scope of Parameters by changing the Parameter File Heading section.
  1. [Global] -> All Integration Services, Workflows, Worklets, Sessions.
  2. [Service:IntegrationService_Name] -> The Named Integration Service and Workflows, Worklets, Sessions that runs under this IS.
  3. [Service:IntegrationService_Name.ND:Node_Name]
  4. [Folder_Name.WF:Workflow_Name] -> The Named workflow and all sessions within the workflow.
  5. [Folder_Name.WF:Workflow_Name.WT:Worklet_Name] -> The Named worklet and all sessions within the worklet.
  6. [Folder_Name.WF:Workflow_Name.WT:Worklet_Name.WT:Nested_Worklet_Name] -> The Named nested worklet and all sessions within the nested worklet.
  7. [Folder_Name.WF:Workflow_Name.WT:Worklet_Name.ST:Session_Name] -> The Named Session.
  8. [Folder_Name.WF:Workflow_Name.ST:Session_Name] -> The Named Session.
  9. [Folder_Name.ST:Session_Name] -> The Named Session.
  10. [Session_Name] -> The Named Session.

Types of Parameters and Variables

There are many types of Parameters and Variables we can define. Please find below the comprehensive list:
  • Service Variables: To override the Integration Service variables such as email addresses, log file counts, and error thresholds. Examples of service variables are $PMSuccessEmailUser, $PMFailureEmailUser, $PMWorkflowLogCount, $PMSessionLogCount, and $PMSessionErrorThreshold.
  • Service Process Variables: To override the the directories for Integration Service files for each Integration Service process. Examples of service process variables are $PMRootDir, $PMSessionLogDir and $PMBadFileDir.
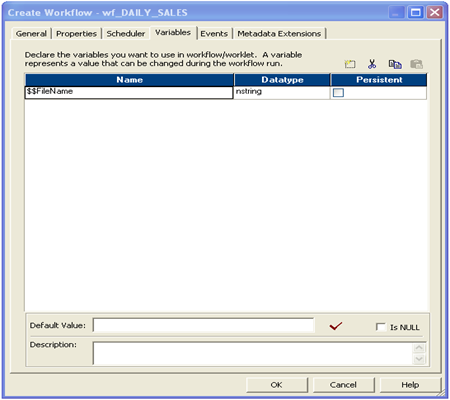
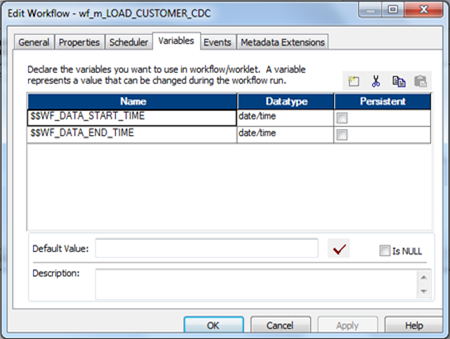
  • Workflow Variables: To use any variable values at workflow level. User-defined workflow variables like $$Rec_Cnt
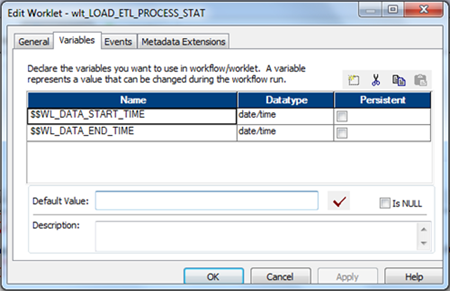
  • Worklet Variables: To use any variable values at worklet level. User-defined worklet variables like $$Rec_Cnt. We can use predefined worklet variables like $TaskName.PrevTaskStatus in a parent workflow, but we cannot use workflow variables from the parent workflow in a worklet.
  • Session Parameters: Define values that may change from session to session, such as database connections, db owner, or file names. $PMSessionLogFile, $DynamicPartitionCount and $Param_Tgt_Tablename are user-defined session parameters. List of other built in Session Parameters:
    $PMFolderName, $PMIntegrationServiceName, $PMMappingName, $PMRepositoryServiceName, $PMRepositoryUserName, $PMSessionName, PMSessionRunMode [Normal/Recovery], $PM_SQ_EMP@numAffectedRows, $PM_SQ_EMP@numAppliedRows, $PM_SQ_EMP@numRejectedRows, $PM_SQ_EMP@TableName, $PM_TGT_EMP@numAffectedRows, $PM_TGT_EMP@numAppliedRows, $PM_TGT_EMP@numRejectedRows, $PM_TGT_EMP@TableName, $PMWorkflowName, $PMWorkflowRunId, $PMWorkflowRunInstanceName.
    Note: Here SQ_EMP is the Source Qualifier Name and TGT_EMP is the Target Definition.
  • Mapping Parameters: Define values that remain constant throughout a session run. Examples are $$LOAD_SRC, $$LOAD_DT. Predefined parameters examples are $$PushdownConfig.
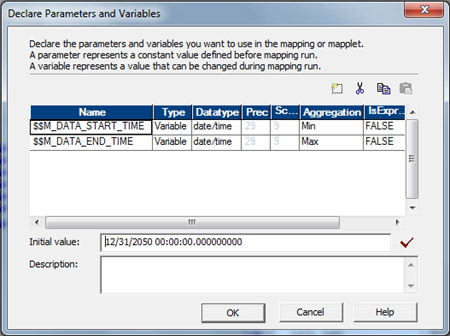
  • Mapping Variables: Define values that changes during a session run. The Integration Service saves the value of a mapping variable to the repository at the end of each successful session run and uses that value the next time you run the session. Example $$MAX_LOAD_DT

Difference between Mapping Parameters and Variables

A mapping parameter represents a constant value that we can define before running a session. A mapping parameter retains the same value throughout the entire session. If we want to change the value of a mapping parameter between session runs we need to Update the parameter file.
A mapping variable represents a value that can change through the session. The Integration Service saves the value of a mapping variable to the repository at the end of each successful session run and uses that value the next time when we run the session. Variable functions like SetMaxVariable, SetMinVariable, SetVariable, SetCountVariable are used in the mapping to change the value of the variable. At the beginning of a session, the Integration Service evaluates references to a variable to determine the start value. At the end of a successful session, the Integration Service saves the final value of the variable to the repository. The next time we run the session, the Integration Service evaluates references to the variable to the saved value. To override the saved value, define the start value of the variable in the parameter file.

Parameterize Connection Object

First of all the most common thing we usually Parameterise is the Relational Connection Objects. Since starting from Development to Production environment the connection information obviously gets changed. Hence we prefer to go with parameterisation rather than to set the connection objects for each and every source, target and lookup every time we migrate our code to new environment.E.g.
  • $DBConnection_SRC
  • $DBConnection_TGT
If we have one source and one target connection objects in your mapping, better we relate all the Sources, Targets, Lookups and Stored Procedures with $Source and $Target connection. Next we only parameterize $Source and $Target connection information as:
  • $Source connection value with the Parameterised Connection $DBConnection_SRC
  • $Target connection value with the Parameterised Connection $DBConnection_TGT
Lets have a look how the Parameter file looks like. Parameterization can be done at folder level, workflow level, worklet level and till session level.
[WorkFolder.WF:wf_Parameterize_Src.ST:s_m_Parameterize_Src]
$DBConnection_SRC=Info_Src_Conn
$DBConnection_TGT=Info_Tgt_Conn
Connection Object Parameter
Here Info_Src_Conn, Info_Tgt_Conn are Informatica Relational Connection Objects.
Note: $DBConnection lets Informatica know that we are Parameterizing Relational Connection Objects.
For Application Connections use $AppConnection_Siebel, $LoaderConnection_Orcl when parameterizing Loader Connection Objects and $QueueConnection_portal for Queue Connection Objects.
In a precise manner we can use Mapping level Parameter and Variables as and when required. For example $$LOAD_SRC, $$LOAD_CTRY, $$COMISSION, $$DEFAULT_DATE, $$CDC_DT.

Parameterize Source Target Table and Owner Name

Situation may arrive when we need to use a single mapping from various different DB Schema and Table and load the data to different DB Schema and Table. Condition provided the table structure is the same.
A practical scenario may be we need to load employee information of IND, SGP and AUS and load into global datawarehouse. The source tables may be orcl_ind.emp, orcl_sgp.employee, orcl_aus.emp_aus.
So we can fully parameterise the Source and Target table name and owner name.
  • $Param_Src_Tablename
  • $Param_Src_Ownername
  • $Param_Tgt_Tablename
  • $Param_Tgt_Ownername
The Parameterfile:-
[WorkFolder.WF:wf_Parameterize_Src.ST:s_m_Parameterize_Src]
$DBConnection_SRC=Info_Src_Conn
$DBConnection_TGT=Info_Tgt_Conn
$Param_Src_Ownername=ODS
$Param_Src_Tablename=EMPLOYEE_IND
$Param_Tgt_Ownername=DWH
$Param_Tgt_Tablename=EMPLOYEE_GLOBAL
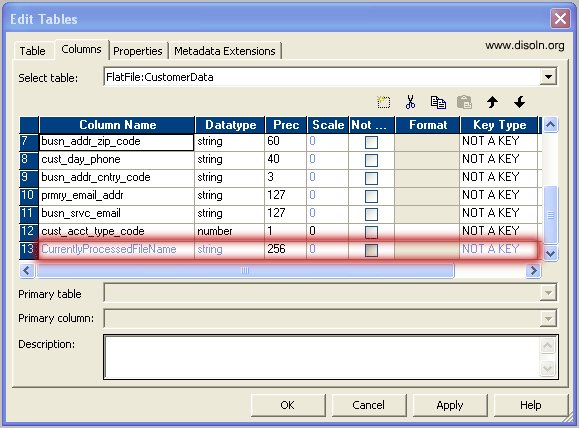
Check the implementation image below:
Source Tablename and Ownername
Target Tablename and Ownername

Parameterize Source Qualifier Attributes

Next comes what are the other attributes we can parameterize in Source Qualifier.
  • Sql Query: $Param_SQL
  • Source Filter: $Param_Filter
  • Pre SQL: $Param_Src_Presql
  • Post SQL: $Param_Src_Postsql
If we have user-defined SQL statement having join as well as filter condition, its better to add a$$WHERE clause at the end of your SQL query. Here the $$WHERE is just a Mapping level Parameter you define in your parameter file.
In general $$WHERE will be blank. Suppose we want to run the mapping for todays date or some other filter criteria, what you need to do is just to change the value of $$WHERE in Parameter file.
$$WHERE=AND LAST_UPDATED_DATE > SYSDATE -1 
[WHERE clause already in override query]
OR 
$$WHERE=WHERE LAST_UPDATED_DATE > SYSDATE -1 
[NO WHERE clause in override query]

Parameterize Target Definition Attributes

Next what are the other attributes we can parameterize in Target Definition.
  • Update Override: $Param_UpdOverride
  • Pre SQL: $Param_Tgt_Presql
  • Post SQL: $Param_Tgt_Postsql
$Param_UpdOverride=UPDATE $$Target_Tablename.EMPLOYEE_G SET 
ENAME = :TU.ENAME, JOB = :TU.JOB, MGR = :TU.MGR, HIREDATE = :TU.HIREDATE, 
SAL = :TU.SAL, COMM = :TU.COMM, DEPTNO = :TU.DEPTNO
WHERE EMPNO = :TU.EMPNO

Parameterize Flatfile Attributes

Now lets see what we can do when it comes to Source, Target or Lookup Flatfiles.
  • Source file directory: $PMSourceFileDir\ [Default location SrcFiles]
  • Source filename: $InputFile_EMP
  • Source Code Page: $Param_Src_CodePage
  • Target file directory: $$PMTargetFileDir\ [Default location TgtFiles]
  • Target filename: $OutputFile_EMP
  • Reject file directory: $PMBadFileDir\ [Default location BadFiles]
  • Reject file: $BadFile_EMP
  • Target Code Page: $Param_Tgt_CodePage
  • Header Command: $Param_headerCmd
  • Footer Command: $Param_footerCmd
  • Lookup Flatfile: $LookupFile_DEPT
  • Lookup Cache file Prefix: $Param_CacheName

Parameterize FTP Connection Object Attributes

Now for FTP connection objects following are the attributes we can parameterize:
  • FTP Connection Name: $FTPConnection_SGUX
  • Remote Filename: $Param_FTPConnection_SGUX_Remote_Filename [Use the directory path and filename if directory is differnt than default directory]
  • Is Staged: $Param_FTPConnection_SGUX_Is_Staged
  • Is Transfer Mode ASCII:$Param_FTPConnection_SGUX_Is_Transfer_Mode_ASCII
Parameterization of Username and password information of connection objects are possible with$Param_OrclUname.
When it comes to password its recommended to Encrypt the password in the parameter file using the pmpasswd command line program with the CRYPT_DATA encryption type.

Using Parameter File

We can specify the parameter file name and directory in the workflow or session properties or in the pmcmd command line.
We can use parameter files with the pmcmd startworkflow or starttask commands. These commands allows us to specify the parameter file to use when we start a workflow or session.
The pmcmd -paramfile option defines which parameter file to use when a session or workflow runs. The -localparamfile option defines a parameter file on a local machine that we can reference when we do not have access to parameter files on the Integration Service machine
The following command starts workflow using the parameter file, param.txt:
pmcmd startworkflow -u USERNAME -p PASSWORD 
-sv INTEGRATIONSERVICENAME -d DOMAINNAME -f FOLDER
-paramfile 'infa_shared/BWParam/param.txt' 
WORKFLOWNAME
The following command starts taskA using the parameter file, param.txt:
pmcmd starttask -u USERNAME -p PASSWORD 
-sv INTEGRATIONSERVICENAME -d DOMAINNAME -f FOLDER
-w WORKFLOWNAME -paramfile 'infa_shared/BWParam/param.txt' 
SESSION_NAME

Workflow and Session Level Parameter File

When we define a workflow parameter file and a session parameter file for a session within the workflow, the Integration Service uses the workflow parameter file, and ignores the session parameter file. What if we want to read some parameters from Parameter file at Workflow level and some defined at Session Level parameter file.
The solution is simple:
  • Define Workflow Parameter file. Say infa_shared/BWParam/param_global.txt
  • Define Workflow Variable and assign its value in param_global.txt with the session level param file name. Say $$var_param_file=/infa_shared/BWParam/param_runtime.txt
  • In the session properties for the session, set the parameter file name to this workflow variable.
  • Add $PMMergeSessParamFile=TRUE in the Workflow level Parameter file.
Content of infa_shared/BWParam/param_global.txt
[WorkFolder.WF:wf_runtime_param]
$DBConnection_SRC=Info_Src_Conn
$DBConnection_TGT=Info_Tgt_Conn
$PMMergeSessParamFile=TRUE
$$var_param_file=infa_shared/BWParam/param_runtime.txt
Content of infa_shared/BWParam/param_runtime.txt
[WorkFolder.wf:wf_runtime_param.ST:s_m_emp_cdc]
$$start_date=2010-11-02
$$end_date=2010-12-08
The $PMMergeSessParamFile property causes the Integration Service to read both the session and workflow parameter files.

Sunday 17 March 2013

What is a FACT LESS FACT TABLE? Where we use Factless Fact?


We know that fact table is a collection of many facts and measures having multiple keys joined with one or more dimension tables. Facts contain both numeric and additive fields. But factless fact table are different from all these.
factless fact table is fact table that does not contain fact. They contain only dimensional keys and it captures events that happen only at information level but not included in the calculations level. just an information about an event that happen over a period.
A factless fact table captures the many-to-many relationships between dimensions, but contains no numeric or textual facts. They are often used to record events or coverage information. Common examples of factless fact tables include:
  • Identifying product promotion events (to determine promoted products that didn’t sell)
  • Tracking student attendance or registration events
  • Tracking insurance-related accident events
  • Identifying building, facility, and equipment schedules for a hospital or university
Factless fact tables are used for tracking a process or collecting stats. They are called so because, the fact table does not have aggregate table numeric values or information. There are two types of factless fact tables: those that describe events, and those that describe conditions. Both may play important roles in your dimensional models.
Factless fact tables for events
The first type of factless fact table is a table that records an event. Many event-tracking tables in dimensional data warehouses turn out to be factless. Sometimes there seem to be no facts associated with an importantbusiness process. Events or activities occur that you wish to track, but you find no measurements. In situations like this, build a standard transaction-grained fact table that contains no facts.
For eg.
The above fact is used to capture the leave taken by an employee. Whenever an employee takes leave a record is created with the dimensions. Using the fact FACT_LEAVE we can answer many questions like
  • Number of leaves taken by an employee
  • The type of leave an employee takes
  • Details of the employee who took leave
Factless fact tables for conditions
Factless fact tables are also used to model conditions or other important relationships among dimensions. In these cases, there are no clear transactions or events. It is used to support negative analysis report. For example a Store that did not sell a product for a given period.  To produce such report, you need to have a fact table to capture all the possible combinations.  You can then figure out what is missing.
For eg, fact_promo gives the information about the products which have promotions but still did not sell
This  fact answers the below questions:
  • To find out products that have promotions.
  • To find out products that have promotion that sell.
  • The list of products that have promotion but did not sell.
This kind of factless fact table is used to track conditions, coverage or eligibility.  In Kimball terminology, it is called a “coverage table.”
Note:
We may have the question that why we cannot include these information in the actual fact table .The problem is that if we do so then the fact size will increase enormously.
Factless fact table is crucial in many complex business processes. By applying you can design a dimensional model that has no clear facts to produce more meaningful information for your business processes. Factless fact table itself can be used to generate the useful reports.

Event Wait Task for Dynamically Changing File Names


Whenever we schedule an Informatica Workflow, most of the times even before the actual session can run, we need to check some prerequisites like, successful completion of source system data loads, arrival of source data files etc.  Informatica PowerCenter Workflow Manager provides task such as ‘Timer’, ‘Event Wait’, Event Raise’ for such validations and checks.  In this article lets see how we can configure ‘Event Wait’ task to check the existence for a file with dynamically changing name.

For the demonstration, lets consider a scenario, where we need to reads data from the daily sales file and load into a relational table.  This source file is supposed to be available daily at 08:00 PM with a naming standard ‘daily_sales_mm-dd-yyyy.csv’

Informatica Implementation

Here we will just concentrate on building the workflow.
As the first step, lets create the workflow and a workflow variable $$FileName as shown in below image.
    • $$FileName as NSTRING
Informatica Woekfloe Variable
Now Create an Assignment task and assign the value of the Variable as below. This variable will set the value of the file, to be waited dynamically.
  • $$FileName := 'daily_sales_' || TO_CHAR(SYSDATE,'MM-DD-YYYY') || '.csv' 
Informatica Assignment Task
Now we need to create an ‘Event Wait’ task to wait for the Source File, which has the dynamic name. We will be using the workflow variable created in the previous step for the same as shown down below.

Informatica Event Wait
Now we just need to add the session which reads data from the source file. You can use the same parameter for the source file.

Informatica Workflow
You can schedule the workflow to run daily 08:00 PM as the last step.
Informatica Scheduler

Extracting Information from the Source File Name can Never be Easier


Many times we get data files from different sources and the source file name itself might contain some valid information like 'file creation date', 'file generated department name', 'region name' etc... We used to use Unix script to extract such information from the file name, but we don't have to write such scripts anymore. In this article let's look at the option provided by Informatica PowerCenter to extract information from the source file name.

Business Requirement

Let's directly jump into the demonstration. For our demonstration, lets consider the "Customer Data" file, which includes all the new customers information. This file comes with the naming format as below
    • Customer_Data_YYYYMMDD.csv
When the file is loaded into the staging table, along with all the source columns, the date part from the source file name needs to be extracted and loaded into the target column AS_OF_DATE as DATE.

Informatica Implementation

As the first step, lets create the source definition based on the source file. Now open the source definition and navigate to the 'Property' tab and set the 'Add Currently Processed Flat File Name Port' as shown in the picture below.


Setting 'Add Currently Processed Flat File Name Port' property will add an additional port'CurrentlyProcessedFileName' in your source definition as shown below image. This port will provide the value of your source file name.


Note : The newly added port can be treated as any normal transformation port. So lets pull all the columns to an expression transformation and extract the date value.

In the Expression Transformation add an output port of DATE data type.

          AS_OF_DATE as Output Port.

And following is  the expression for the port.

         TO_DATE(
                  SUBSTR(CurrentlyProcessedFileName,
                               LENGTH(CurrentlyProcessedFileName)-12,
                               LENGTH(CurrentlyProcessedFileName)-4),
         'YYYYMMDD')


Now map all the columns from the Expression Transformation to the target. After this step the mapping will look like we have it in the below image.


We are all done with the required configuration at the mapping level and we do not need any special setting at theworkflow configuration. Once you run the workflow you will see the target table is loaded with all the column along with AS_OF_DATE which is extracted from the source file name.

Friday 15 March 2013

How to Change the Session Log Name in Informatica Workflow?

Joiner Cache
When a Joiner transformation occurs in a session, the Informatica Server reads all the records from the master source and builds index and data caches based on the master rows. After building the caches, the Joiner transformation reads records from the detail source and performs joins.
Joiner cache have 2 types of cache 1.Index cache 2. Data cache.
Index cache stores all the port values which are participated in the join condition and Data cache have stored all ports which are not participated in the join condition.


How to Change the Session Log Name in Informatica Workflow?


Whenever we run the session in Informatica, integration service creates session log file. By default Session Log File Directory defaults to the service process variable, $PMSessionLogDir and the Session Log File Name defaults to $PMSessionLogFile.
In order to change the session log name you can set the $PMSessionLogFileto Session_test.txt in the parameter file. When you make this change in the parameter file and run the session, the integration service creates a session log file named Session_test.txt

Reusability is a great feature in Informatica PowerCenter which can be used by developers. Its general purpose is to reduce unnecessary coding which ultimately reduces development time and increases supportability. In this article lets see different options available in Informatica PowerCenter to make your code reusable.
  1. Mapplet
  2. Reusable Transformation
  3. Shared Folder
  4. Global Repository
  5. Worklet
  6. Reusable Session
  7. Reusable Tasks
  8. Mapping Parameter
  9. Mapping Variable
  10. WorkFlow Variable
  11. Worklet Variable

1. Mapplet

Mapplet is a reusable object that you create in the Mapplet Designer. It contains a set of transformations and lets you reuse the transformation logic in multiple mappings. When you use a mapplet in a mapping, you use an instance of the mapplet. Any change made to the mapplet is inherited by all instances of the mapplet.
If you have several fact tables that require a series of dimension keys, you can create a mapplet containing a series of Lookup transformations to find each dimension key. You can then use the mapplet in each fact table mapping.

Learn more about Mapplets from the Demo Video
Informatica Mapplet

2. Reusable Transformation

Reusable Transformations can be created in Transformation Developer and can be reused in multiple mappings. When you use a reusable transformation in a mapping, you use an instance of the transformation. Any change made to the transformation is inherited by all its instances.

If you have a business rule to trim spaces from customer name and customer address columns, then you can create a reusable expression transformation to trim spaces from the column, which can be reused in multiple mappings.

Learn more about Reusable Transformations from the Demo Video
Informatica Reusable Transformation

3. Shared Folder

A Shared folder can be created in a Repository from the repository manager. The objects from the shared folder can be accessed using shortcuts from different folders in the same Repository.

You can create all the reusable framework objects (CDC Framework, Error Handling Framework etc...) in the Shared Folder  and can be accessed using shortcuts from different folders in the same  repository.
Informatica PowerCenter Shared Folder

4. Global Repository

A Global Repository can be created in a Repository Domain which is linked to multiple Local Repositories. An object created in the Global Repository is accessible from the Local Repositories using the shortcuts created to the global objects. Any change in the Global Repository Object will be inherited to all the shortcut objects.

You can create all the reusable framework objects (CDC Framework, Error Handling Framework etc...) in the Global Repository and can be accessed using shortcuts from different local repositories.
Informatica PowerCenter Object Shortcut

5. Worklet

A worklet is an object created by combining set of tasks to build a workflow logic. Worklet can be reused in multiple  workflows, which can be configured to run concurrently. You can create a worklet in the Worklet Designer.
Reusable worklet implemented in the Change Data Capture Framework, which is discussed in one of our prior article is a practical  application of worklet.
Informatica PowerCenter Worklet Designer

6. Reusable Session

A session is a set of instructions that tells the Integration Service how and when to move data from sources to  targets. You can create a reusable Session task in the Task Developer. A reusable session can be used multiple workflows and even in a worklet.

Reusable session used in the Operational Metadata Logging Framework, which is discussed in one of our prior article is a practical  implementation of reusable session.
Informatica PowerCenter Reusable Session

7. Reusable Tasks

Apart from the reusable session task, we can create reusable email task and reusable command task in the Task  Developer. We can reuse these reusable tasks in multiple workflows and worklets.

A reusable email task can be used to create a standard session failure email notification, which can be reused in different session tasks.
Informatica PowerCenter Task Developer

8. Mapping Parameter

Define values that remain constant throughout a session, such as state sales tax rates. When declared in a mapping or mapplet, $$ParameterName is a user-defined mapping parameter. 
Informatica Mapping Parameter

9. Mapping Variable

Define values that can change during a session. The Integration Service saves the value of a mapping variable to the repository at the end of each successful session run and uses that value the next time you run the session. When declared in a mapping or mapplet, $$VariableName is a mapping variable. Read more about mapping variables implementation from the article Change Data Capture (CDC) Made Easy Using Mapping Variables
Informatica Mapping variables

10. WorkFlow Variable

You can create user defined workflow variables to pass variable values between mapping, sessions within a workflow. Even if the workflow variables alone do not give code reusability, it works with other components to provide reusability. Read more on workflow variable from the article An ETL Framework for Change Data Capture.
Informatica Workflow Variables

11. Worklet Variable

User defined worklet variables can be create in worklets to pass values between mapping, sessions, worklets within a workflow. Worklet variables by itself do not give code reusability, but it works with other components to facilitate code reusability. Learn more on worklet variable from the article An ETL Framework for Change Data Capture.
Informatica Worklet Variables
In addition to the parameters and variables mentioned above, Informatica PowerCenter provides much more type of Variables and Parameters, which provide more flexibility to build reusable code, such as
    • Service variables.
    • Service process variables.
    • Session parameters.
    • $Source. $Target connection variables.
    • Email variables.
    • Local variables.
    • Built-in variables.

Thursday 14 March 2013

Error Handling


Error Handling
Identifying errors and creating an error handling strategy is very important. The 2 types of errors in an ETL process are – Data Errors & Process Errors.
To handle Data errors we can use the Row Error Logging feature. The errors are captured into the error tables. We can then analyse, correct and reprocess them.
To handle Process errors we can configure an email task to notify the event of a session failure.
Row Error Logging: When we configure the session with this option the Integration service logs errors information to relational tables or to an error log file.
First time it creates the table or a file and then onwards it appends to the existing table or file. This log file contains information such as source name, row ID, row data, transformation error code etc. which can be used to determine the cause & source of an error.
By default the Integration service does not write the dropped rows to session log or create a reject file. So we can enable verbose tracing to write to session log. Performance is decreased as one row at a time is processed.

There is one file called the bad file which generally has the format as *.bad and it contains the records rejected by informatica server. There are two parameters one fort the types of row and other for the types of columns. The row indicators signifies what operation is going to take place ( i.e. insertion, deletion, updation etc.). The column indicators contain information regarding why the column has been rejected.( such as violation of not null constraint, value error, overflow etc.) If one rectifies the error in the data preesent in the bad file and then reloads the data in the target,then the table will contain only valid data.

Error Handling is one of the must have components in any Data Warehouse or Data Integration project. When we start with any Data Warehouse or Data Integration projects,business users come up with set of exceptions to be handled in the ETL process. In this article,  lets talk about how do we easily handle these user defined error.

Informatica Functions Used

We are going to use two functions provided by Informatica PowerCenter to define our user defined error capture logic. Before we get into the coding lets understand the functions, which we are going to use.
  1. ERROR() 
  2. ABORT()
ERROR() : This function Causes the PowerCenter Integration Service to skip a row and issue an error message, which you define. The error message displays in the session log or written to the error log tables based on the error logging type configuration in the session.

ABORT() 
: Stops the session, and issues a specified error message to the session log file or written to the error log tables based on the error logging type configuration in the session. When the PowerCenter Integration Service encounters an ABORT function, it stops transforming data at that row. It processes any rows read before the session aborts.

Note : Use the ERROR, ABORT function for both input and output port default values. You might use these functions for input ports to keep null values from passing into a transformation and use for output ports to handle any kind of transformation error.

Informatica Implementation

For the demonstration lets consider a workflow which loads daily credit card transactions and below two user defined data validation checks
  1. Should not load any transaction with 0 (zero) amount, but capture such transactions into error tables
  2. Should not process any transactions with out credit card number and Stop the workflow.

Mapping Level Changes

To handle both the exceptions, lets create an expression transformation and add two variable ports.
  • TEST_TRANS_AMOUNT as Variable Port
  • TEST_CREDIT_CARD_NB as Variable Port
Add below expression for both ports. First expression will take care of the user defined data validation check No 1 and second expression will take care of user defined data validation check No 2.
  • TEST_TRANS_AMOUNT :- IIF(TRANS_AMOUNT = 0,ERROR('0 (Zero) Transaction Amount'))
  • TEST_CREDIT_CARD_NB :- IIF(ISNULL(LTRIM(RTRIM(CREDIT_CARD_ND))),ABORT('Empty Credit Card Number'))
The complete expression transformation is shown in below image.
Informatica Error ABORT functions usage
Now insert this transformation in the mapping where you need the data validation and complete the mapping.

Hint :  This Expression can be converted into a Reusable transformation, So that any mapping needs this data validation can reuse this transformation.

Session Level Changes

Once the mapping is complete, configure the session and provide the settings for row error logging as shown in below image. Please read the article Error handling made easy using Informatica Row Error Logging for more details on row error logging.
informatica row error logging
With this configuration we specified, Informatica PowerCenter will create four different tables for error logging and the table details as below.
  • ETL_PMERR_DATA :- Stores data about a transformation row error and its corresponding source row.
  • ETL_PMERR_MSG :- Stores metadata about an error and the error message.
  • ETL_PMERR_SESS :- Stores metadata about the session.
  • ETL_PMERR_TRANS :- Stores metadata about the source and transformation ports, when error occurs.
With this, we are done with the setting required to capture user defined errors.  Any data records which violates our data validation check will be captured into PMERR tables mentioned above.

Report the Error Data.

Now we have the error data stored in the error table, we can pull the error report using an SQL querry. Below is a basic query to get the error report. We can be more fancy with the SQL and get more information from the error tables.

select 
       sess.FOLDER_NAME as 'Folder Name',
       sess.WORKFLOW_NAME as 'WorkFlow Name',
       sess.TASK_INST_PATH as 'Session Name',
       data.SOURCE_ROW_DATA as 'Source Data',
       msg.ERROR_MSG as 'Error MSG'
from 
       ETL_PMERR_SESS sess
left outer join ETL_PMERR_DATA data
      on data.WORKFLOW_RUN_ID = sess.WORKFLOW_RUN_ID and 
      data.SESS_INST_ID = sess.SESS_INST_ID
left outer join ETL_PMERR_MSG msg
      on msg.WORKFLOW_RUN_ID = sess.WORKFLOW_RUN_ID and 
      msg.SESS_INST_ID = sess.SESS_INST_ID
where 
      sess.FOLDER_NAME = <Project Folder Name> and
      sess.WORKFLOW_NAME = <Workflow Name> and
      sess.TASK_INST_PATH = <Session Name> and
      sess.SESS_START_TIME = <Session Run Time>

Pros and Cons of this Approach.

We should know the Pros and Cons of this approach  before applying this to your project.

Pros.

  1. Out of the box Solution Provided by Informatica.
  2. Less Coding and Testing efforts required by the development team.

Cons.

  1. Added overhead to the Session performance, which is expected and acceptable.